> ## Documentation Index
> Fetch the complete documentation index at: https://docs.tight.com/llms.txt
> Use this file to discover all available pages before exploring further.
# Mileage Dashboard Component
If you want to get up and running quickly with a proven mileage tracking dashboard that matches your colors, fonts, and branding, then the Embeddable User Interface is your best bet.
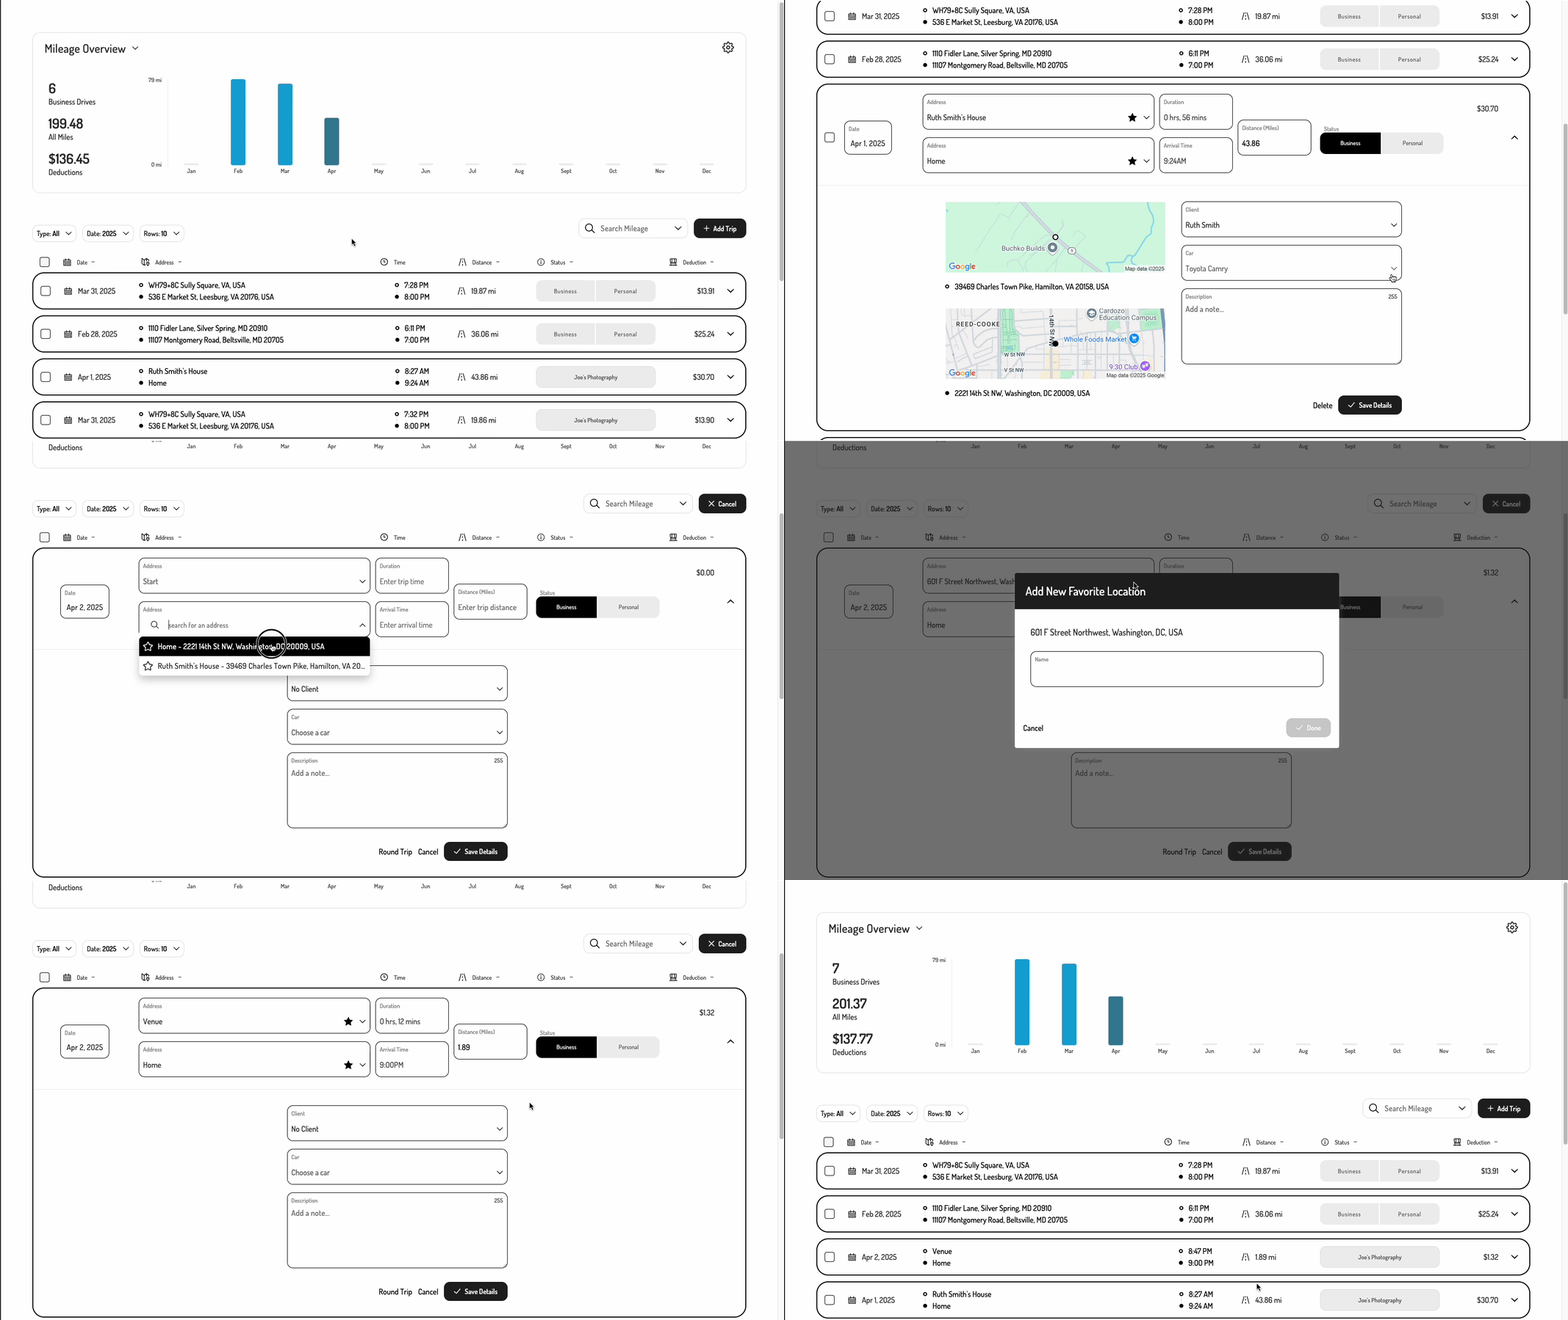 ## 1. Initializing the Embedded Experience
To initialize the Tight Embedded experience in your project, follow the instructions on [Embedding Tight's white-labelled UI](/v5.0/getting-started/quickstart/embedded-ui#2-embedding-hurdlrs-white-labelled-ui-hurdlr-sdk).
## 2. Adding the Mileage Dashboard to your app
To render the Mileage Dashboard, you will need to provide the `elementId` parameter, which is the HTML `id` of the main `
## 1. Initializing the Embedded Experience
To initialize the Tight Embedded experience in your project, follow the instructions on [Embedding Tight's white-labelled UI](/v5.0/getting-started/quickstart/embedded-ui#2-embedding-hurdlrs-white-labelled-ui-hurdlr-sdk).
## 2. Adding the Mileage Dashboard to your app
To render the Mileage Dashboard, you will need to provide the `elementId` parameter, which is the HTML `id` of the main `` where you would like the Mileage Dashboard to render. When your user taps on your "Mileage" navigation CTA, you simply need to invoke the following line of javascript:
```javascript theme={null}
Hurdlr.renderScreen(elementId, 'mileageDash');
```
## 3. Customizing the UI to match your branding
Tight's API team can quickly customize the UI to match your branding. Please follow the instructions on [Customizing the embedded UI to match your branding](/v5.0/getting-started/quickstart/embedded-ui#1-customizing-the-embedded-ui-to-match-your-branding).