> ## Documentation Index
> Fetch the complete documentation index at: https://docs.tight.com/llms.txt
> Use this file to discover all available pages before exploring further.
# Gusto Embedded
If your users run payroll or want the ability to grow into running payroll, then your product would likely benefit from Tight's [Gusto](https://gusto.com/) payroll integration.
## 1. How it works
Through Tight's Gusto integration, your users can create a new Gusto payroll account or link an existing one, all within your own UX.
In addition to a seamless UX, you and your users can rest assured knowing that the complex accounting that payroll necessitates is automatically taken care of. When your user runs a payroll, the necessary [accounting](/v5.0/products/accounting) transactions are automatically created in the user's [General Ledger](/v5.0/products/accounting/general-ledger). Furthermore, when the bank withdrawals (i.e. [expense transactions](/v5.0/products/bank-transactions-1/expense-tracking)) come in several days later, the Tight API will automatically reconcile those with the payroll run, keeping the user's General Ledger and balance sheets in sync, without any manual labor required from your user (or [their accountants](https://docs.hurdlr.com/docs/virtual-bookkeeping)).
That reconciliation process, when done manually, can be very complex as a single Gusto payroll run typically includes at least three bank withdrawals, all of which need to be mapped to [different accounts](/v5.0/products/accounting/chart-of-accounts). With the Tight API, this is a non-issue.
Your user may never need to look at their General Ledger, however the Tight API still maintains that for them in the background, which [enables you to ultimately support the future use cases](/v5.0/products/accounting#2-what-it-enables) they will eventually need.
## 2. Getting started
If you haven't already done so, you should [create a developer account with Gusto](https://dev.gusto.com/).
> 📘 In the Gusto + Tight integration, you own the relationship with Gusto. However, if you do not currently have any relationship with Gusto, please do not hesitate to reach out to [api@tight.com](mailto:api@tight.com), and our API team would be glad to make an introduction to the proper contact within the Gusto team.
Once you're logged into Gusto's developer portal, you'll want to [create an Organization](https://dev.gusto.com/organizations), which should be named after your *company*.
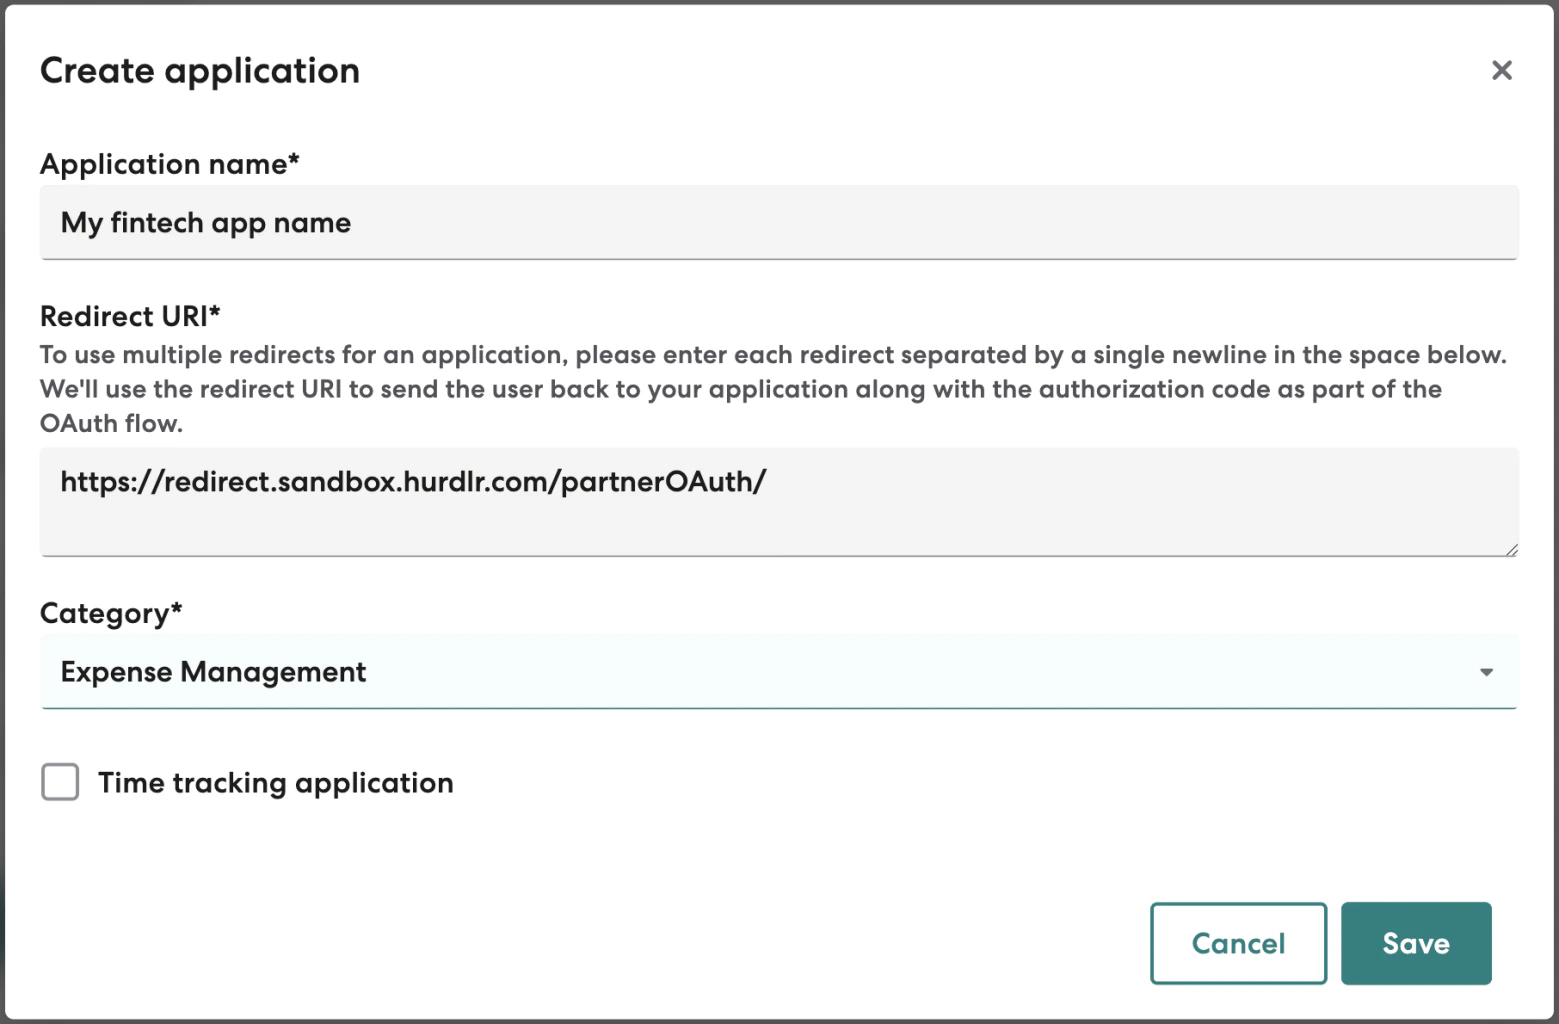
Once you have created your Organization, you will need to [create an Application](https://dev.gusto.com/applications), which should be named after your *product*. First, you should create a product for the "demo" stage. When you create the product, you will be prompted to enter a `Redirect URI`, which you should enter as `https://redirect.sandbox.hurdlr.com/partnerOAuth`:
 Once you are done creating the Application, you will see the ability to copy your application's `Client ID` and `Secret`:
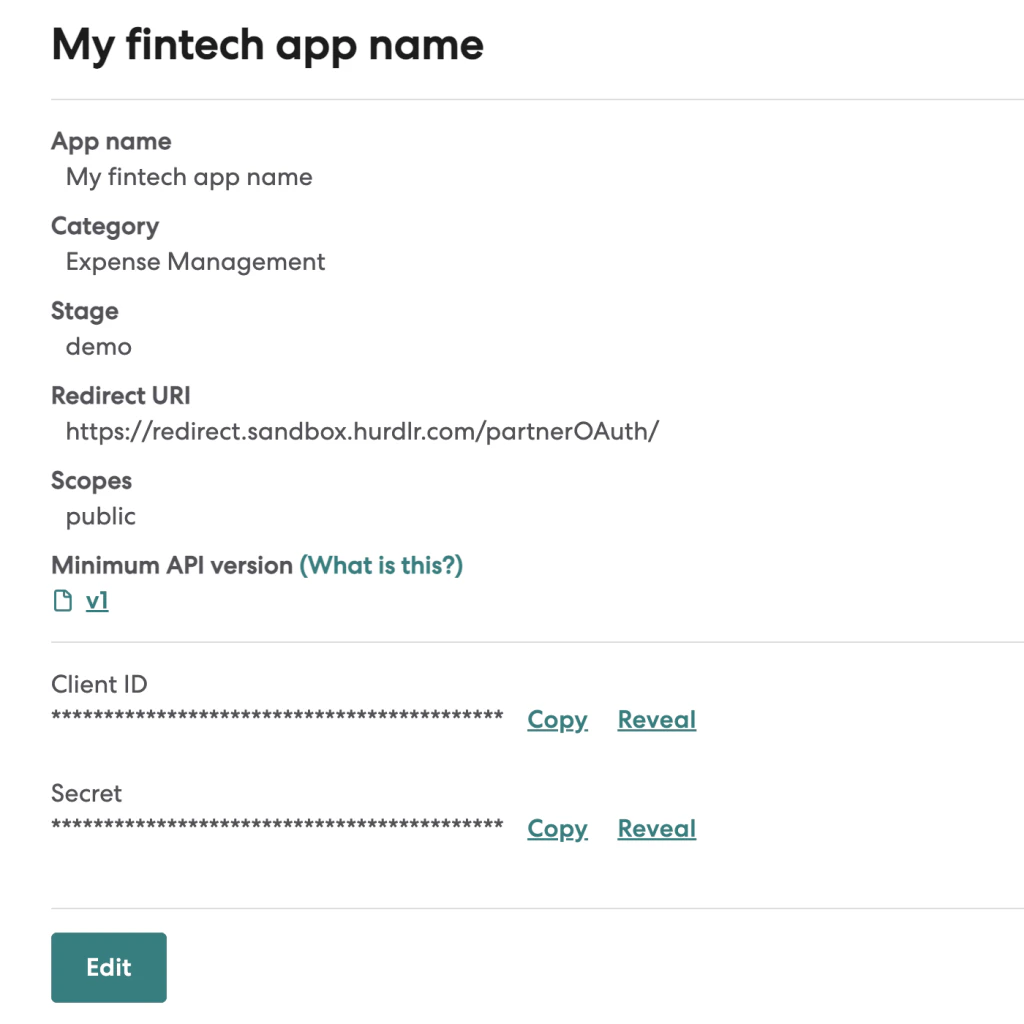 You should then copy both the `Client ID` and `Secret` fields that are displayed, and paste them into your own text file. Contact us directly at [api@tight.com](mailto:api@tight.com) for instructions on how to securely share the `Client ID` and `Secret`.
Once you are ready to go live in the "Production" environment, you can repeat the above steps on the "Production" version of your application, and then use `https://redirect.prod.hurdlr.com/partnerOAuth/` as the `Redirect URI`.
## 3. Embeddable User Interface (Payroll Dashboard)
To embed the Payroll Dashboard within your own web app, so that your users can see the accounting breakdown (and matching withdrawals) of each payroll run, you can follow the simple steps below:
a. Initialize the Tight SDK in your project by following the instructions on [Embedding Tight's white labelled UI](/v5.0/getting-started/quickstart/embedded-ui#2-embedding-hurdlrs-white-labelled-ui-hurdlr-sdk). Be sure to use the `accessToken` that pertains to the [specific user](/v5.0/getting-started/quickstart/user-creation#2-receiving-the-users-access_token) that has logged into your web app.
b. To render the Payroll Dashboard, you will need to provide the `elementId` parameter, which is the HTML `id` of the main `
You should then copy both the `Client ID` and `Secret` fields that are displayed, and paste them into your own text file. Contact us directly at [api@tight.com](mailto:api@tight.com) for instructions on how to securely share the `Client ID` and `Secret`.
Once you are ready to go live in the "Production" environment, you can repeat the above steps on the "Production" version of your application, and then use `https://redirect.prod.hurdlr.com/partnerOAuth/` as the `Redirect URI`.
## 3. Embeddable User Interface (Payroll Dashboard)
To embed the Payroll Dashboard within your own web app, so that your users can see the accounting breakdown (and matching withdrawals) of each payroll run, you can follow the simple steps below:
a. Initialize the Tight SDK in your project by following the instructions on [Embedding Tight's white labelled UI](/v5.0/getting-started/quickstart/embedded-ui#2-embedding-hurdlrs-white-labelled-ui-hurdlr-sdk). Be sure to use the `accessToken` that pertains to the [specific user](/v5.0/getting-started/quickstart/user-creation#2-receiving-the-users-access_token) that has logged into your web app.
b. To render the Payroll Dashboard, you will need to provide the `elementId` parameter, which is the HTML `id` of the main `` where you would like the Payroll Dashboard to render. Simply invoke the following line of javascript:
```javascript theme={null}
Hurdlr.renderScreen(elementId, 'payrollDash');
```