Overview
Tight integrates directly with Google Cloud Storage to periodically upload raw accounting data to your own GCS buckets. By pushing data into your GCS infrastructure, Tight eliminates the need for your data team to build direct connections to the Tight API, allowing your team to work in the data stack they’re already using.
Data is exported in Parquet file format on daily, weekly, or monthly intervals, including bank linkage data, invoices, lifecycle events, and transactions. Learn more about available data types and use cases in the Data Lakes guide.
Create a Service Account
First, create a service account to grant programmatic access to the Google Cloud Storage bucket.
In the Google Cloud Console, navigate to IAM & Admin → Service Accounts and click “Create Service Account”. Provide a descriptive name like “tight-api-data-access” and description:
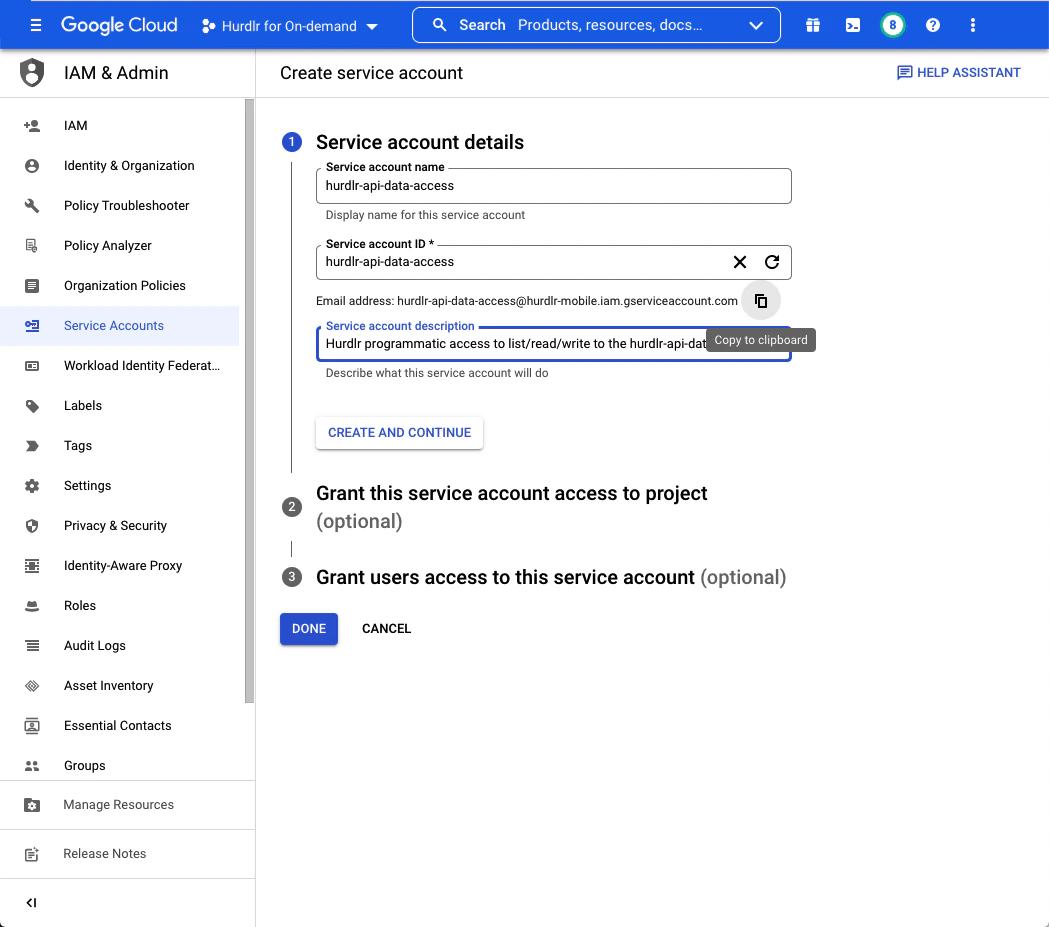 After entering the service account details, click “Copy to clipboard” below the email address that was created. Save this email address for later steps. Then click “CREATE AND CONTINUE” followed by “DONE”.
Keep the service account email address handy - you’ll need it in later steps to grant bucket permissions.
Create a Google Cloud Storage Bucket
Next, create a Google Cloud Storage bucket where Tight will store your data. We recommend naming this bucket “tight-api-data”:
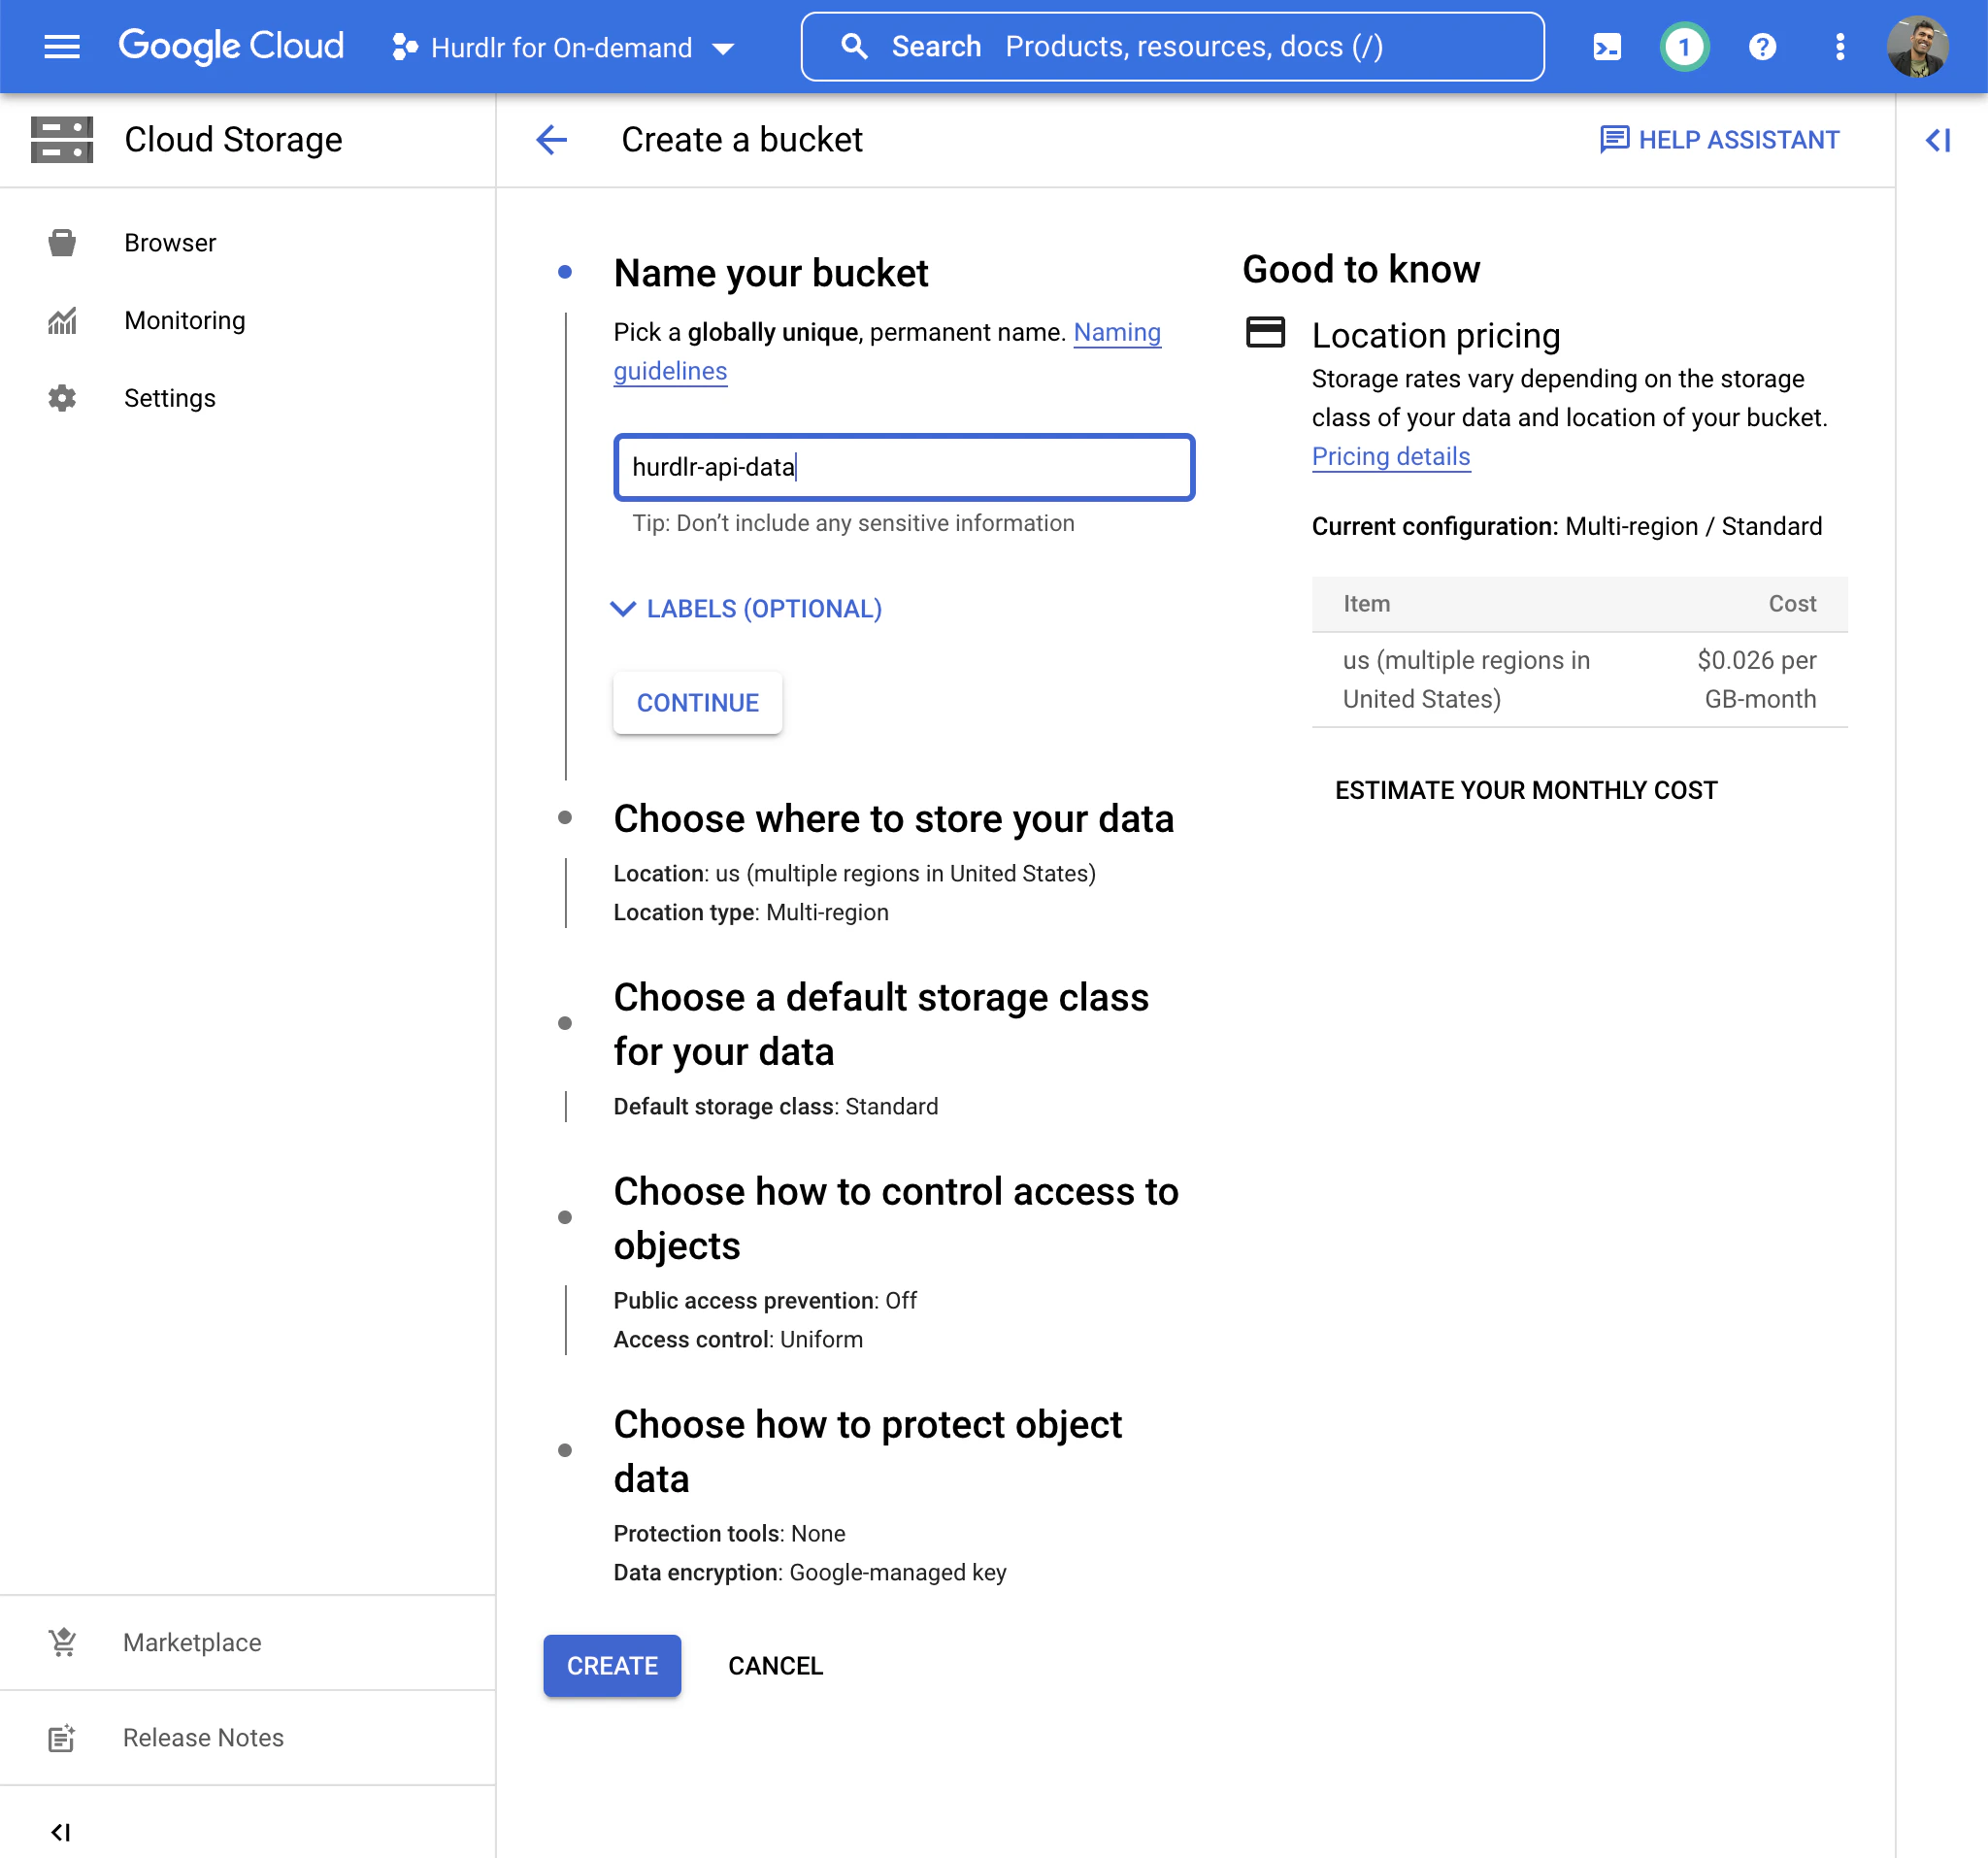 For “Choose where to store your data” and “Choose a default storage class for your data”, you can use the default values.
For “Choose how to control access to objects”, select “Enforce public access prevention on this bucket” and “Access Control: Fine-grained”:
For “Choose where to store your data” and “Choose a default storage class for your data”, you can use the default values.
For “Choose how to control access to objects”, select “Enforce public access prevention on this bucket” and “Access Control: Fine-grained”:
 For “Choose how to protect object data”, select “None” unless your compliance requirements dictate otherwise. Be aware that data protection options will increase your storage costs.
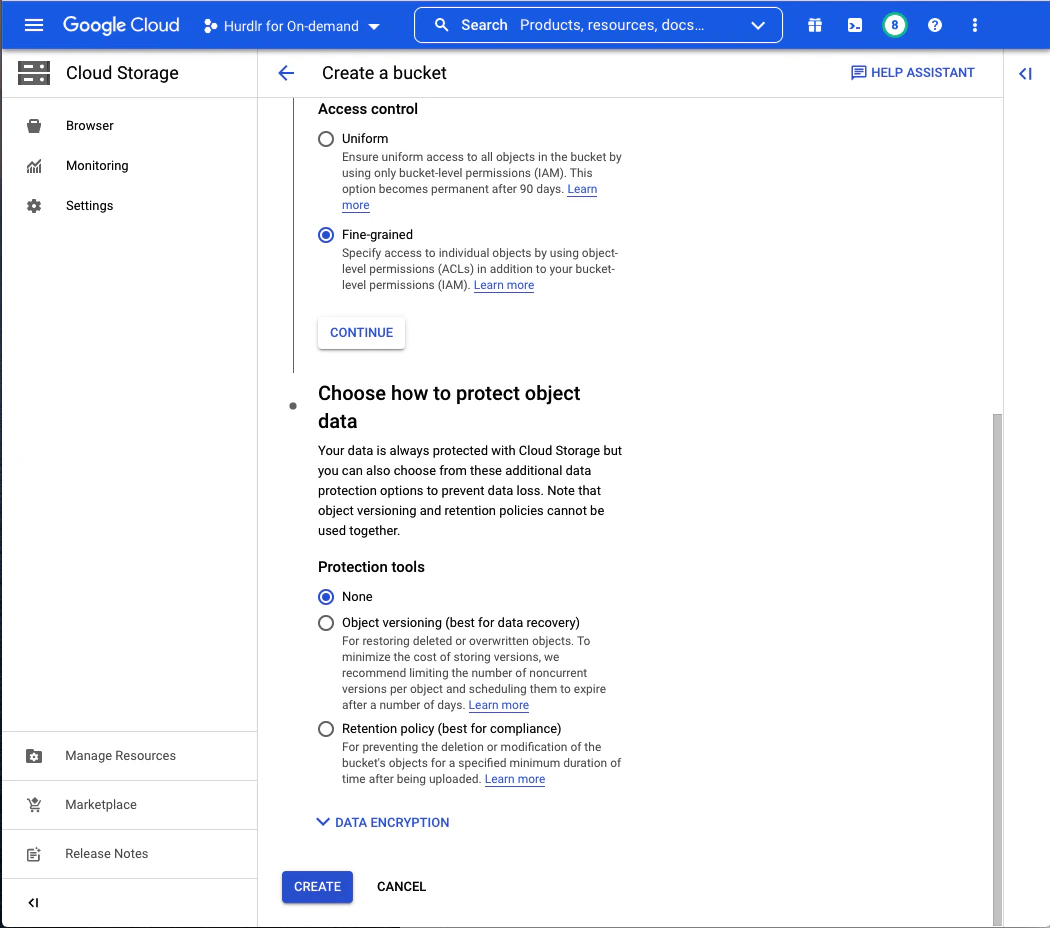 Click “CREATE” to finish creating the bucket.
Grant Service Account Access to Bucket
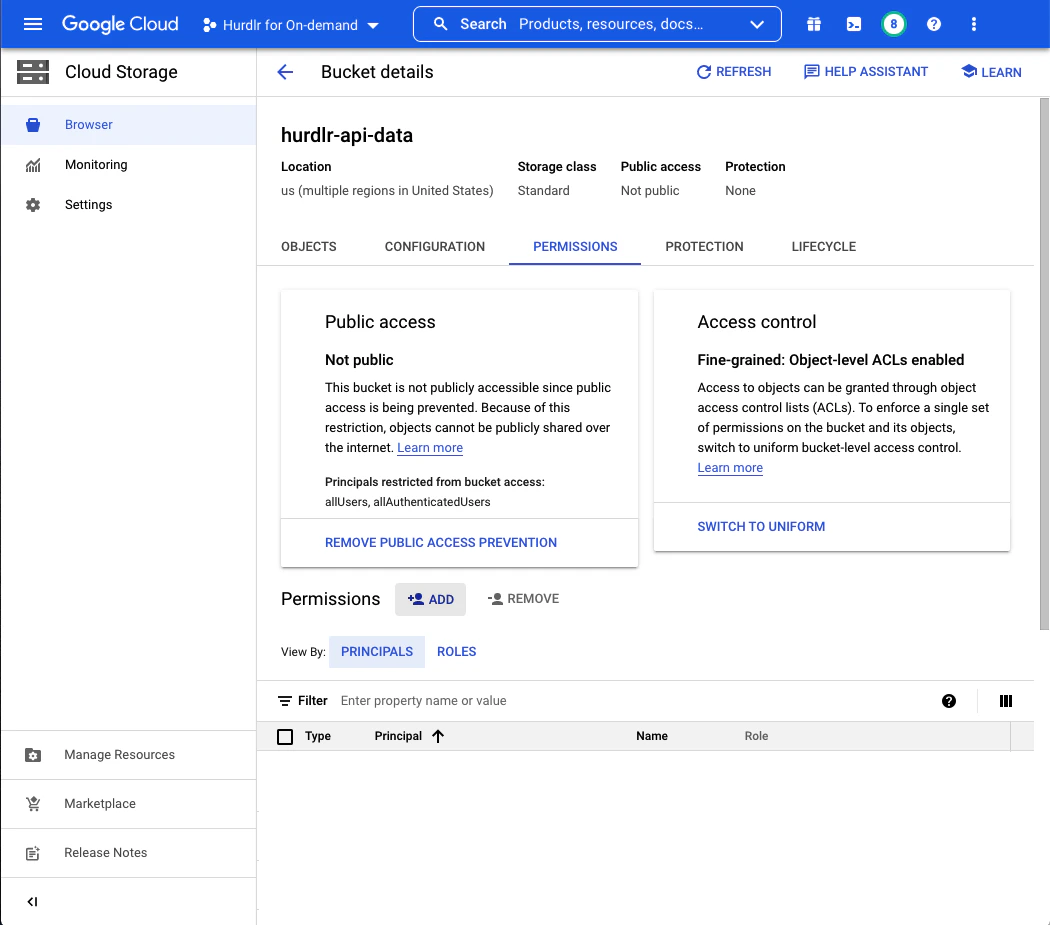
Once the bucket is created, you’ll be taken to the Bucket Details screen. Click on the “PERMISSIONS” tab and then click “ADD”:
 In the “New Principals” field, paste the service account email address you copied earlier, and set the role to “Storage Object Admin”:
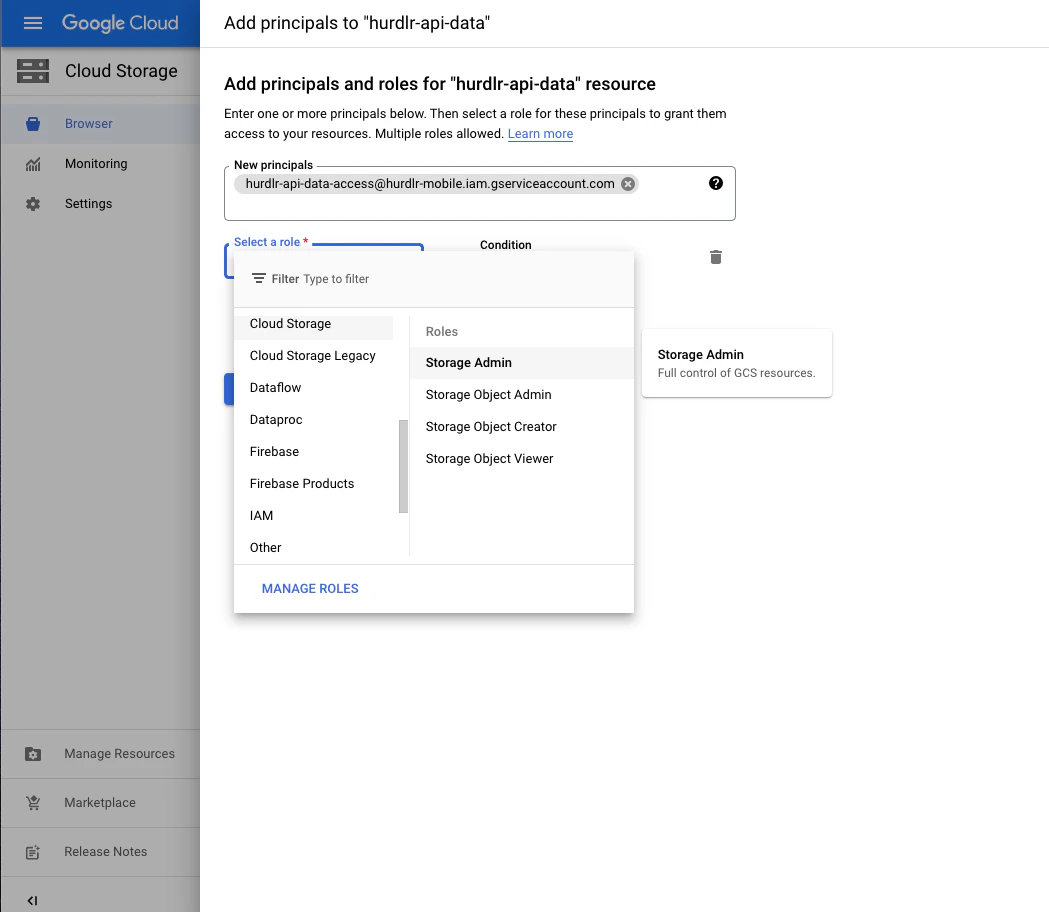 Click “SAVE” to grant the service account access to your bucket.
Create Service Account HMAC Key
Next, create a service account HMAC key for authentication.
From the Cloud Storage screen, click on “Settings”, then select the “Interoperability” tab:
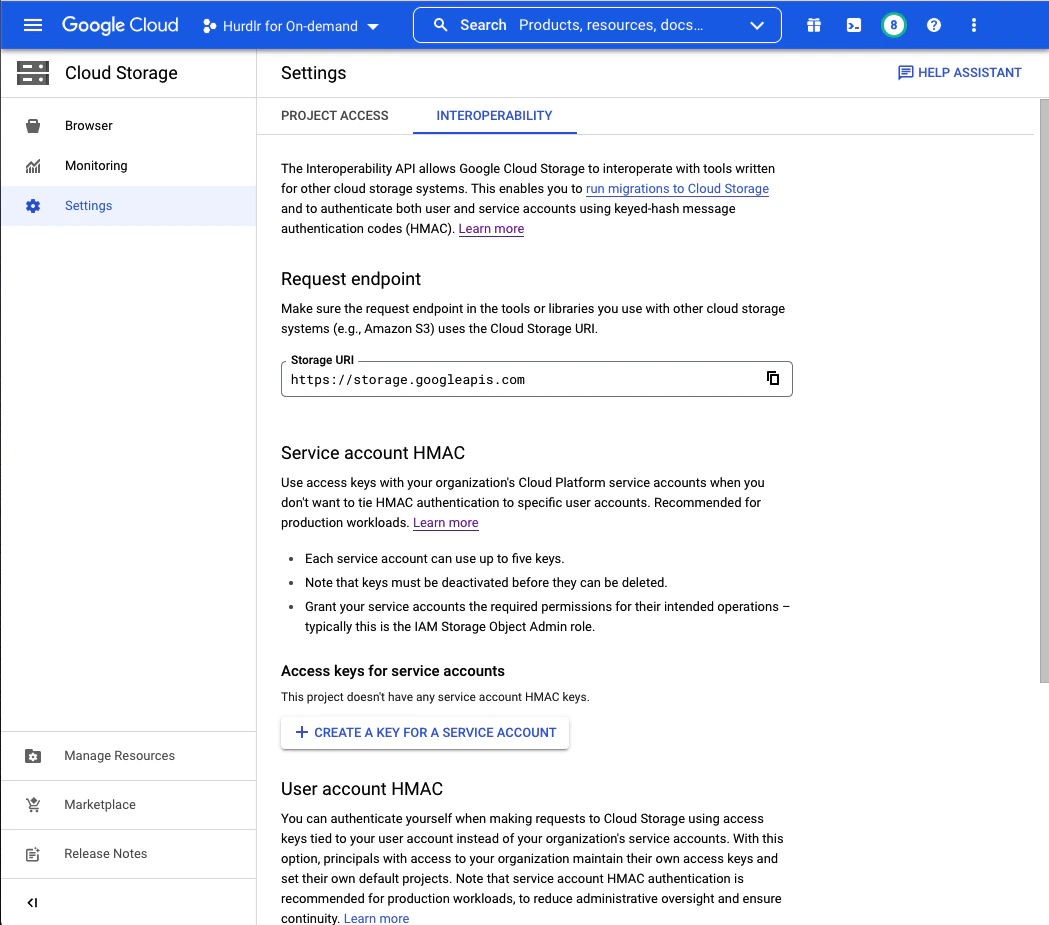 Click “CREATE A KEY FOR A SERVICE ACCOUNT”, paste the service account email address, and select the row for that account:
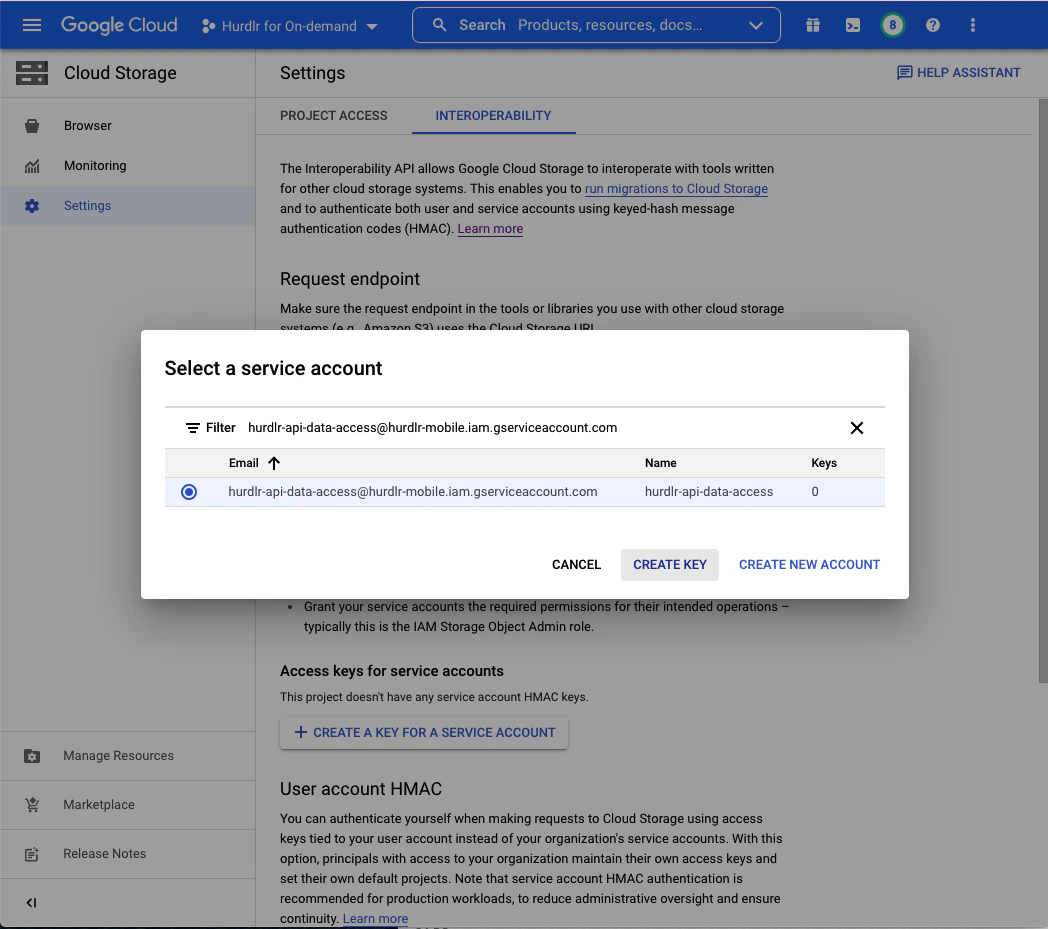 Click “CREATE KEY” to generate the HMAC key. You’ll see a screen displaying both the Access Key and Secret. Copy both values and save them securely:
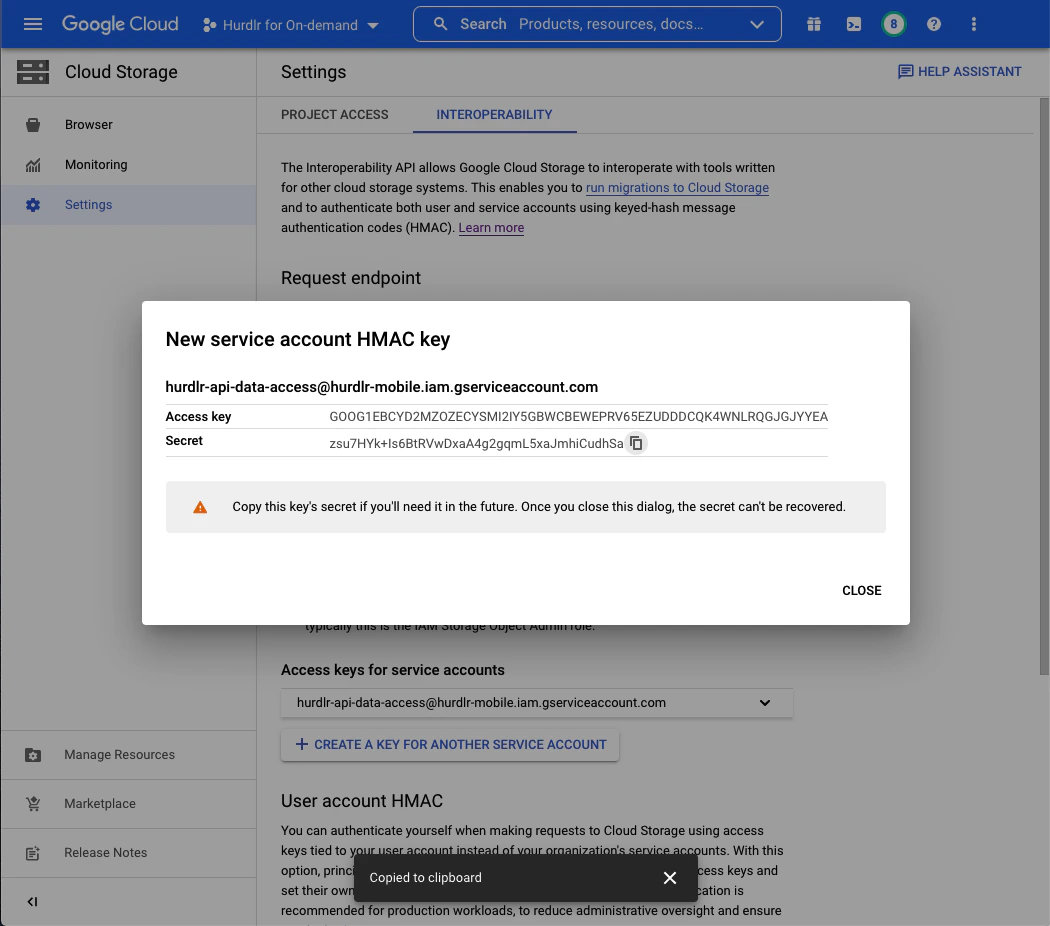
Store the Access Key and Secret securely - you won’t be able to view the Secret again after this screen.
Securely Share Access with Tight
Contact Tight directly at api@tight.com for instructions on how to securely share:
- Your GCS bucket name
- The HMAC Access Key
- The HMAC Secret
Once configured, Tight will automatically begin uploading data files to your GCS bucket based on your preferred schedule (daily, weekly, or monthly). Files are organized in a consistent directory structure within your bucket, making it easy to integrate with your existing data pipelines and analytics tools.